I’m not sure how many of you have turned pieces then finished them with a painted or dyed feature while the rest of the piece remains natural. It can be a bit of a pain to get it “just right”. If you are adept at painting freehand, you are in luck. For the rest of us, challenges abound. Typically it is desirable to bracket the feature with some type of turned element – say, a bead or a groove. Delineating between the two can be a problem if a sharp line is what you are after – and that is usually the case.
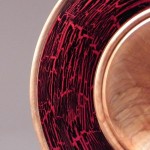
There are a couple of solutions. Take, for instance, a platter with a decorated rim. It is possible to finish turn the area to be painted but leave the turned element unfinished. Paint, dye or other can be applied then finish turn the bead or groove leaving a crisp edge. This is fine except for the drying time that keeps your lathe tied up while that happens, which can mean days in the case of multiple coats. If you’re like me, you usually also want to get on with things. Not only that but the piece probably warps to a small degree in the meantime causing runout in the finish cut as in the example here. Another option is to finish turn the whole thing then mask the bead/groove before applying the colour. Typically there is leaking along the mask creating the need to re-turn that area slightly. Anyone who has remounted a piece after a day or more knows that things aren’t running in the same plane anymore and runout occurs in this instance as well, leaving an uneven cut at the edge. Sometimes you can get it close and sometimes, well…
Treating problems rather then symptoms is always a good practice. In this case, painting a clean line on a curved surface with a very long circumference can be very difficult and time consuming. In the case of spraying, masking is required. In the case of dyes, burning a line in a groove cauterizes the wood fibers preventing dye from spreading beyond the line. This is not a bad solution for dye and adds a feature line to boot. Masking seems to be a non-starter, because most finishes will leak under the tape, especially if it overlaps, which is unavoidable on compound curves. But wait… recently I purchased some “Frog Tape”. Touted as the wonder tape of the masking world I thought I would give it a try. Formulated to work with water based products, its adhesive reacts with water to create a solid barrier at the interface between the two. Damned if that doesn’t work!
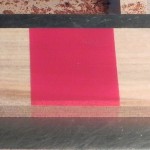
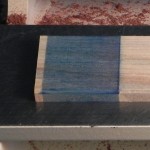
The example here shows a clean edge on the left of the red paint (Frog Tape) and a rough edge on the right (regular masking tape). The blue colour is water based dye with Frog Tape on both sides. Applied sparingly, the tape provided a barrier on the left of the blue. Applied copiously it bled through the wood under the ape on the right. Clearly it works with dyes as long is it is applied sparingly rather than flooding the piece.
On to the next problem. Typically as turners we are working with compound curves; areas that curve in more than one plane. Relatively wide tape will only bend in one plane or on very, very mild compound curves, hence we use short pieces, overlapping them to get our circle. The colour medium leaks under that lap no matter how good the tape is. The tape bends over compound curves to a relative degree; the width of the tape determining the severity of the curve
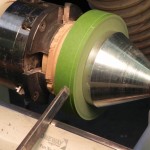
Since the narrower the tape is the more radically it can form to compound curves, it would seem that a narrow tape is the answer – but they only sell it in 3/4″ width at the narrowest. I have found that tape 1/8″-3/16″ wide works on just about any compound curve I can throw at it. The solution; cut the tape to that width. Not long ago I came up with a method of accurately cutting tape into narrower widths with ease. By turning a mandrel in a chuck to hold the roll then backing it with a broad revolving center on the tail stock to hold it true, the cut can be made very easily with a skew. It isn’t necessary to cut the whole roll, only enough to get the job done. The remaining tape on the other side of the cut is still suitable for other masking. If more is needed it’s a simple matter to cut more.
Applying the narrower tape accurately in one long strip without overlaps is very easy. Since it’s probably not wide enough – especially if spraying – it’s a simple matter to then use short, wide pieces overlapping themselves to complete the job. Overlaps further away from the interface edge are not a consequence, even for spraying.
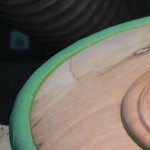
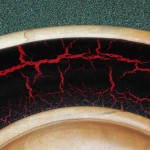
I experimented with a crackle faced platter using a base colour, a crackle medium, a top colour and finally a seal coat. That’s quite a pile of paint but it worked perfectly. The only issue I had was the thickness of paint bonding the finish to the tape. It was a simple matter to cut the finish at the tape edge with a sharp knife to separate the two. When removed, the line was as crisp as would ever have wanted.
Remember that this tape works only with water based mediums. If using lacquers or oil based paints, the issue of leaking under the tape is still there but by using narrow tape to conform to the curve, at least the voids created by overlapping the tape are eliminated.
As always, you comments are welcomed.

2 Responses to Masking Made Easy