Well this was a first for me. I have always admired gilding on various pieces that others have done. Enough that I knew I would get around to doing something myself one day but never finding any pieces that were suitable. I’ll be darned if two didn’t crop up at the same time just the other day. Actually, one has been glaring at me for some time before the idea of gilding popped up but because that was on my mind, the next one presented itself in short order.

Before. Not the stunner I was looking for.
Both were pieces that had a problem; one missing that certain something and the other with a built in design opportunity. The first one was a collaboration piece with Eric Lofstorm. Eric had turned a winged bowl while demonstrating for the Fraser Valley guild and donated it to the guild for auction. My part was to tidy up the turning and apply a finish. I chose to dye it (big surprise) since it was a lovely little piece of quilt. The multi stage dye worked out well on the quilt but the fading I applied in the teeny bowl portion didn’t turn out the way I had pictured. I applied a lacquer finish and pouted. One day it occurred to me that gilding the bowl would spark it up and provide the central focus I had been hoping for, so I planned a trip to Opus to pick up some gilding materials. Before I could get to the little winged bowl, I turned another piece that begged for “something else” to finish it off. I had a lovely piece of Silver Maple burl that I made into a slender fluted vase shape with a natural edge rim. Unfortunately a stubborn bark inclusion just wouldn’t go away as I turned. The inclusion wasn’t very attractive but as I was turning it, rather than loose the majority of the wood to get rid of it, it occurred to me that I could use it as a feature if I gilded it and then matched it around the natural edge. I had gone from never having done any guilding to two pieces waiting on deck.

After. Now that's better.
At one time foil gilding was an art reserved for a very small group of highly skilled artisans who practiced their trade for years before achieving beautiful results. Although I am sure that my effort would be considered bumbling in comparison, the materials that are available now made me look pretty good on my first attempt without wasting a king’s ransom on the floor. I was very pleased with the outcome. When I found the materials at the store I was able to pick up some sample packs of foil with some small bottles of size and top coat, large enough to do the job. Since I had only small areas to do, I picked up a package of simulated plain gold foil as well as some variegated material without putting too big of a dent in my pocket. The same thing that draws me to figured wood probably drew me to the variegated more than the plain gold, but I got both anyway. The foil is synthetic rather than real gold and I am thinking something in the mylar family: definitely some kind of plastic. Never mind sneezing, don’t even breathe hard around this stuff.

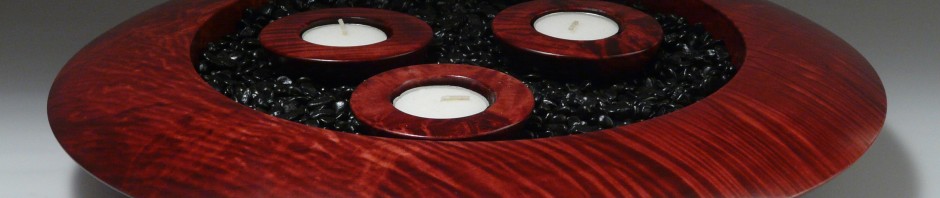
Taking advantage of a "design opportunity".
I watched a demo on gilding eons ago and read little bits here and there along the way, so had an idea of what I was in for. One of the reasons I chose the sample packs was that they had instructions included. They seemed pretty simple and they certainly were. I had to apply a glue size, let it dry to a tacky stage, apply the foil and top coat then I was done. The glue size stays tacky for 24 hours so I had lots of wiggle room if things dragged out. The foil was a bit of a stinker to handle with my stubby, chubby fingers but both projects required small pieces to be applied to follow the tight curve of the bowl and the convoluted surface of the natural edge. In some cases a pair of tweezers were pressed into service to handle the tiny bits. An artist’s brush is required to pounce (multiple “taps” with the brush ends) the foil into place on the surface. Understandably, the pieces of foil overlapped but it is so thin that when the area is completely covered, simply brushing the foil wisks away any foil that is not on the glued surface, leaving no overlapping material and no ragged edges. In the end it looked like one continuous sheet. Voila! A master on my first attempt.
I’m not so foolish to think that that is all there is to this gilding thing. I know there is more and I sure wouldn’t try it with the real thing until I had a far better handle on things, but I am definitely sure I have a new tool in the box. My only problem will be to not add gilding to everything in sight in the near future. It sure was easy and looked great on the pieces that I had chosen.
As always, I encourage your comments and questions, so please refer to the tag line at the bottom of the article to post a comment.
2 Responses to Gilding